One Sticker Set Monster Hunter Sticker Set
- One Fine Art Print
SCHEDULE:
1. Week 01 - Address UVs and texture research for stylized PBR.
2. Week 02 - Substance painter jail.
3. Week 03 - Polish textures and nice lighting set-up/renders turntable for presentation.
WHAT ACTUALLY HAPPENED THIS WEEK:
1. I sprained both (yes both) of my wrists.
2. I broke my toe.
3. I got a fever for 3 days and was hallucinating off of cough syrup.
You can guess the order of how these happened.


The lighting for this hasn't changed but it WILL BE. TRUST.
For this project I'm going back and finishing a project where the last thing I needed to do was focus on texturing.
SCHEDULE:
1. Week 01 - Address UVs and texture research for stylized PBR.
2. Week 02 - Substance painter jail.
3. Week 03 - Polish textures and nice lighting set-up/renders turntable for presentation.
Reference:


For this research project, I was interesting in creating a moving screen material in unreal for my tamgotchi model!
The goal was to create an LCD type screen that would resemble what would traditionally be on a tamagotchi, but with a little bit of *spice*.


Add Texture Sample (a sprite sheet of glitch frames).

Add a Dot Grid Texture (tileable).
Multiply Texture Coordinates by a high value (ex: TextCoord * 100) to tile the pattern.
Multiply or Lerp this with your Base Color to simulate screen subpixels.
Optional: Invert grid (1 - Texture) for different styles.

Add a Time Node → Multiply by speed ( ex: Time * 6.28)
Pipe into a Sine Node → Output ranges from -1 to 1.
Use a Lerp node (A= 0.8 B=1.2) → plug Sine result as Alpha.
Multiply Lerp output with Base Color or Emissive to simulate flickering brightness.

Use Screen Position node → get Normalized Viewport UVs.
Subtract 0.5 from both X and Y → Center it.
Get Length of resulting vector (distance from center).
Apply 1- Saturate *2.0 or Smoothstep to shape falloff.
Multiply with Emissive or Base Color to darken edges.

Use Sine(Time + UV.y * Frequency) for animated lines.
Or use Frac(UV.y * 100) to get horizontal bands.
Optional: Combine with Noise Texture for jitter.
Add or Multiply this with Emissive to create line flickers.

Multiply or Lerp all effects into a final Emissive output:
((Base Color x Dot Grid x Flicker x Vignette) + Scan Lines) x Mask -> Plug into Emissive Color


SCHEDULE:
1. Week 01 - Proxy Model (Block out pass). 2. Week 02 - Have all hard-surface modelling done in maya. 3. Week 03 - UV mesh and texture implementation in substance. 4. Week 04 - Polish Texturing and have everything in engine with a proper lighting set up.


SCHEDULE:
1. Week 01 - Proxy Model (Block out pass). 2. Week 02 - Have all hard-surface modelling done in maya. 3. Week 03 - UV mesh and texture implementation in substance. 4. Week 04 - Polish Texturing and have everything in engine with a proper lighting set up.

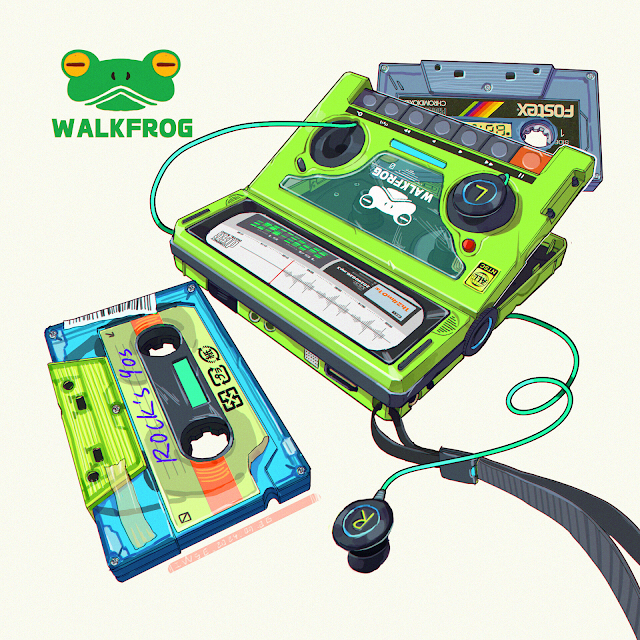
For the next project I'm doing, I've signed myself up to recreate another piece of concept art from the same artist that drew the concept art from previous project.

SCHEDULE:
1. Week 01 - Proxy Model (Block out pass). 2. Week 02 - Have all hard-surface modelling done in maya, clean w/ game res, uv'd. 3. Week 03 - Texturing research and implementation in substance. 4. Week 04 - Polish Texturing and have everything in engine with a proper lighting set up.
RESEARCH:
Jessica Marrubini
https://www.artstation.com/artwork/EzNYVK


REFERENCE:

BLOCK-OUT IN MAYA:


1. Week 01 - Proxy Model (Block out pass).


ORIGINAL SCHEDULE:
1. Week 01 - Proxy Model (Block out pass). 2. Week 02 - Have High Res model completed. 3. Week 03 - Game Resolution Mesh, Finish UVs, Begin Texturing. 4. Week 04 - Finish Texturing and have everything in engine with a proper lighting set up.
This is the project I decided to replicate for the first project.
For this project I gathered reference on the different pieces involved in making a walkman like object, especially because there are parts that will be able to be seen internally due to some of the textures having transparency. Additionally, I gathered reference for the various materials for the look I'm going for, which is pushing much more towards realism.

A lot of the references were related to this one artist on artstation Jessica Marrubini. Been looking through their artstation and several posts have videos that you're able to go through and have different breakdowns.
https://www.artstation.com/artwork/yDeNVK
https://www.artstation.com/artwork/g0LweG
SCHEDULE:
1. Week 01 - Proxy Model (Block out pass). 2. Week 02 - Have High Res model completed. 3. Week 03 - Game Resolution Mesh, Finish UVs, Begin Texturing. 4. Week 04 - Finish Texturing and have everything in engine with a proper lighting set up.
Here is the current blockout within MAYA: